安装依赖
1
| yum install -y lzo lzo-devel openssl openssl-devel pam pam-devel net-tools git lz4-devel
|
安装 easy-rsa
1
2
3
| mkdir /data/
wget -P /data/ http://down.i4t.com/easy-rsa.zip
unzip -d /usr/local /data/easy-rsa.zip
|
配置 vars 文件,vim /usr/local/easy-rsa-old-master/easy-rsa/2.0/vars
1
2
3
4
5
6
7
8
| export KEY_COUNTRY="CN"
export KEY_PROVINCE="BJ"
export KEY_CITY="BeiJing"
export KEY_ORG="test"
export KEY_EMAIL="test@test.com"
export KEY_CN=test
export KEY_NAME=test
export KEY_OU=test
|
制作证书
制作 CA 证书
1
2
3
4
| cd /usr/local/easy-rsa-old-master/easy-rsa/2.0/
source ./vars
./clean-all # 执行此命令后,会在当前目录下创建一个 keys 目录
./build-ca # 生成根证书 ca.crt 和密钥 ca.key,由于在 vars 文件中填写了基本信息,一路回车
|
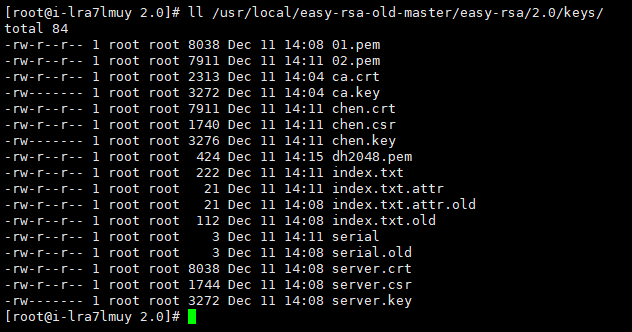
在 keys 目录中,已经生成了 ca.crt 和 ca.key。ca.crt 就是证书文件
制作 server 证书
1
2
3
| cd /usr/local/easy-rsa-old-master/easy-rsa/2.0/
./build-key-server server # 一路回车,最后两步输入 y 即可
|
查看 keys 目录中,已经生成了server.crt、server.csr、server.key 三个文件,其中 server.crt 和 server.key 是我们要用的。
制作 client 证书
1
2
3
| cd /usr/local/easy-rsa-old-master/easy-rsa/2.0/
./build-dh # 会生成 dh2048.pem 文件,生成时间会比较长。生成完成后,会在 keys 目录下生成 dh2048.pem 文件。
|

安装配置 OpenVPN
安装 OpenVPN
 1
 2
 3
 4
 5
 6
 7
 8
 9
10
11
| # 编译安装
https://openvpn.net/index.php/download/community-downloads.html
tar xf openvpn-2.5.4.tar.gz
cd openvpn-2.5.4
./configure --prefix=/usr/local/openvpn
make
make install
# yum 安装
yum install epel-release
yum install openvpn
|
配置 OpenVPN
生成证书
1
2
3
| mkdir -p /etc/openvpn/keys
cd /etc/openvpn/keys/
/usr/local/openvpn/sbin/openvpn --genkey --secret ta.key # 生成 tls-auth 证书
|
把之前生成的证书文件拷贝到证书目录中
拷贝配置文件
1
2
3
4
5
| # 编译安装的路径
cp /data/openvpn-2.5.4/sample/sample-config-files/server.conf /etc/openvpn/
# yum 安装的路径
cp /usr/share/doc/openvpn-2.5.4/sample/sample-config-files/server.conf /etc/openvpn/
|
修改内核参数
vim /etc/sysctl.conf
1
2
3
| net.ipv4.ip_forward = 1
执行 sysctl -p 命令,使其生效
|
修改服务端配置文件
vim /etc/openvpn/server.conf
 1
 2
 3
 4
 5
 6
 7
 8
 9
10
11
12
13
14
15
16
17
18
19
20
21
22
23
24
25
26
27
28
29
30
31
32
33
34
35
36
37
38
39
40
41
42
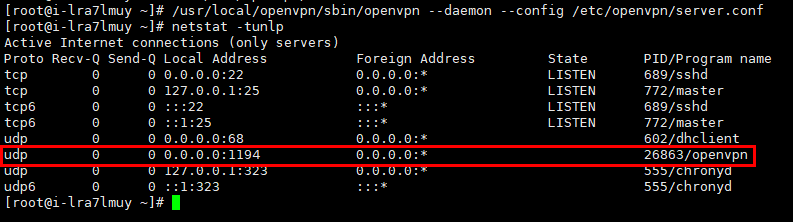
| # 服务端口号
port 1194
# 协议:tcp 或 udp
proto udp
# 生成虚拟网卡
dev tun
# 证书的路径,可以是相对路径或绝对路径
ca /etc/openvpn/keys/ca.crt
cert /etc/openvpn/keys/server.crt
key /etc/openvpn/keys/server.key
dh /etc/openvpn/keys/dh2048.pem
# 虚拟局域网段
server 10.8.0.0 255.255.255.0
ifconfig-pool-persist ipp.txt
push "route 10.8.0.0 255.255.255.0"
# 如果客户端都是用一个证书和密钥连接VPN,需要打开这个选项
client-to-client
duplicate-cn
keepalive 10 120
tls-auth /etc/openvpn/keys/ta.key 0
cipher AES-256-CBC
compress lz4-v2
comp-lzo
persist-key
persist-tun
# 状态日志路径
status openvpn-status.log
# 运行日志路径
log openvpn.log
log-append openvpn.log
# 日志级别
verb 3
|
如果配置了 iptables,需要开启 iptables 策略
1
2
3
| iptables -P FORWARD ACCEPT
iptables -I INPUT -p udp --dport 1194 -m comment --comment "openvpn" -j ACCEPT
iptables -t nat -A POSTROUTING -s 10.8.0.0/24 -j MASQUERADE
|
启动服务
客户端测试
修改客户端配置文件
cp /data/openvpn-2.5.4/sample/sample-config-files/client.conf ./chen.ovpn
 1
 2
 3
 4
 5
 6
 7
 8
 9
10
11
12
13
14
15
| client
dev tun
proto udp
remote 139.198.15.121 1194 # 服务器外网 IP
resolv-retry infinite
nobind
persist-key
persist-tun
ca ca.crt
cert chen.crt # 用户的证书文件
key chen.key # 用户的证书文件
tls-auth ta.key 1
cipher AES-256-CBC
comp-lzo
verb 3
|
导出证书文件
1
2
3
4
5
| sz chen.ovpn
sz /etc/openvpn/keys/ca.crt
sz /etc/openvpn/keys/ta.crt
sz /usr/local/easy-rsa-old-master/easy-rsa/2.0/keys/chen.crt
sz /usr/local/easy-rsa-old-master/easy-rsa/2.0/keys/chen.key
|
以后添加用户时,只需要到 /usr/local/easy-rsa-old-master/easy-rsa/2.0/ 目录下,执行 ./build-key 用户名,在把 keys 目录下的 用户名.crt 和 用户名.key 导出,最后修改 client.ovpn 文件中的 用户名.crt 和 用户名.key
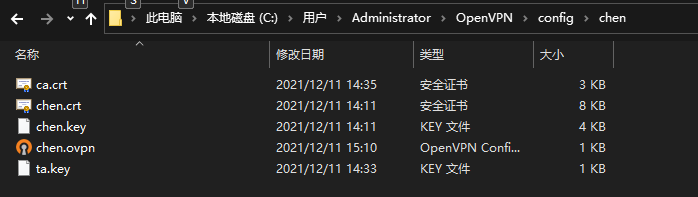
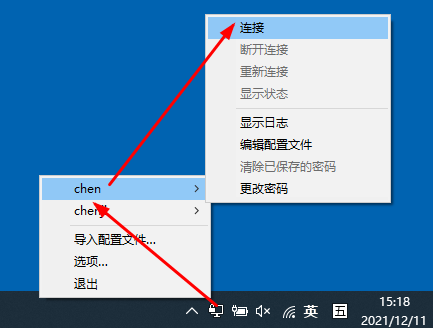
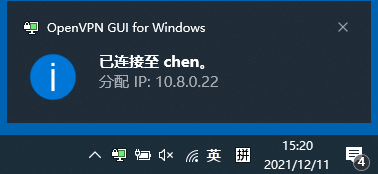
windows 测试
把刚才导出的证书放到下面的目录中
也可以把证书内容放到一个文件中,格式如下:
vim chen.ovpn
 1
 2
 3
 4
 5
 6
 7
 8
 9
10
11
12
13
14
15
| <key>
chen.key
</key>
<cert>
chen.cert
</cert>
<ca>
ca.crt
</ca>
<tls-auth>
ta.key
</tls-auth>
|