ETCD集群部署
环境
| OS | 主机名 | IP |
|---|---|---|
| Kylin Linux Advanced Server V10 | etcd01 | 172.20.10.129 |
| Kylin Linux Advanced Server V10 | etcd02 | 172.20.10.132 |
| Kylin Linux Advanced Server V10 | etcd03 | 172.20.10.134 |
安装
下载、解压安装包
添加环境变量
vim /etc/profile.d/etcd.sh
创建配置文件
创建 etcd01 节点配置文件
vim /etc/etcd/etcd.conf1 2 3 4 5 6 7 8 9 10 11 12 13 14 15 16 17 18# 节点名称 name: "etcd01" # 数据存储目录 data-dir: "/data/etcd" # 对外公告的该节点客户端监听地址,这个值会告诉集群中其他节点 advertise-client-urls: "http://172.20.10.129:2379" # 监听客户端请求的地址列表 listen-client-urls: "http://172.20.10.129:2379,http://127.0.0.1:2379" # 监听URL,用于节点之间通信监听地址 listen-peer-urls: "http://172.20.10.129:2380" # 服务端之间通讯使用的地址列表,该节点同伴监听地址,这个值会告诉集群中其他节点 initial-advertise-peer-urls: "http://172.20.10.129:2380" # etcd启动时,etcd集群的节点地址列表 initial-cluster: "etcd01=http://172.20.10.129:2380,etcd02=http://172.20.10.132:2380,etcd03=http://172.20.10.134:2380" # etcd集群的初始集群令牌 initial-cluster-token: 'etcd-cluster' # etcd集群初始化的状态,new代表新建集群,existing表示加入现有集群 initial-cluster-state: 'new'创建 etcd02 节点配置文件
vim /etc/etcd/etcd.conf1 2 3 4 5 6 7 8 9 10 11 12 13 14 15 16 17 18# 节点名称 name: "etcd02" # 数据存储目录 data-dir: "/data/etcd" # 对外公告的该节点客户端监听地址,这个值会告诉集群中其他节点 advertise-client-urls: "http://172.20.10.132:2379" # 监听客户端请求的地址列表 listen-client-urls: "http://172.20.10.132:2379,http://127.0.0.1:2379" # 监听URL,用于节点之间通信监听地址 listen-peer-urls: "http://172.20.10.132:2380" # 服务端之间通讯使用的地址列表,该节点同伴监听地址,这个值会告诉集群中其他节点 initial-advertise-peer-urls: "http://172.20.10.132:2380" # etcd启动时,etcd集群的节点地址列表 initial-cluster: "etcd01=http://172.20.10.129:2380,etcd02=http://172.20.10.132:2380,etcd03=http://172.20.10.134:2380" # etcd集群的初始集群令牌 initial-cluster-token: 'etcd-cluster' # etcd集群初始化的状态,new代表新建集群,existing表示加入现有集群 initial-cluster-state: 'new'创建 etcd03 节点配置文件
vim /etc/etcd/etcd.conf1 2 3 4 5 6 7 8 9 10 11 12 13 14 15 16 17 18# 节点名称 name: "etcd03" # 数据存储目录 data-dir: "/data/etcd" # 对外公告的该节点客户端监听地址,这个值会告诉集群中其他节点 advertise-client-urls: "http://172.20.10.134:2379" # 监听客户端请求的地址列表 listen-client-urls: "http://172.20.10.134:2379,http://127.0.0.1:2379" # 监听URL,用于节点之间通信监听地址 listen-peer-urls: "http://172.20.10.134:2380" # 服务端之间通讯使用的地址列表,该节点同伴监听地址,这个值会告诉集群中其他节点 initial-advertise-peer-urls: "http://172.20.10.134:2380" # etcd启动时,etcd集群的节点地址列表 initial-cluster: "etcd01=http://172.20.10.129:2380,etcd02=http://172.20.10.132:2380,etcd03=http://172.20.10.134:2380" # etcd集群的初始集群令牌 initial-cluster-token: 'etcd-cluster' # etcd集群初始化的状态,new代表新建集群,existing表示加入现有集群 initial-cluster-state: 'new'
创建启动脚本
vim /usr/lib/systemd/system/etcd.service
| |
启动服务
验证
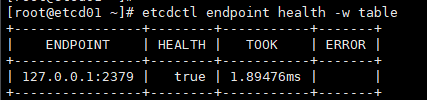
查看 ETCD 集群健康状态

查看 ETCD 集群节点信息

部署 TLS 加密集群
etcd 支持通过 TLS 协议的加密通讯,在实际企业生产环境中,出于安全规范要求,建议开启TLS加密。TLS 通道可以用于加密内部的集群通讯,也可以用于加密客户端请求。 etcd 的 TLS 有两对,一对是 etcd 和 client 端的 TLS 配置。一对是 etcd 之间的 peer 的 TLS 配置。有很多方式可以创建CA证书和私钥,其中比较流行的有两种:openssl 和 cfssl
官方文档推荐使用 cfssl 生成证书。
安装 cfssl
下载地址:https://github.com/cloudflare/cfssl/releases
| |
创建配置文件
证书类型
客户端证书用于服务器验证客户端身份
服务器端证书用于客户端验证服务器端身份
对等证书由etcd集群成员使用,同时使用客户端认证和服务器端认证
创建 CA 证书
修改 ca-config 配置
1 2 3 4 5 6 7 8 9 10 11 12 13 14 15 16 17 18 19 20 21 22 23 24 25 26 27 28 29 30 31 32 33 34 35 36cat > ca-config.json <<EOF { "signing": { "default": { "expiry": "87600h" }, "profiles": { "server": { "expiry": "87600h", "usages": [ "signing", "key encipherment", "server auth" ] }, "client": { "expiry": "87600h", "usages": [ "signing", "key encipherment", "client auth" ] }, "peer": { "expiry": "87600h", "usages": [ "signing", "key encipherment", "server auth", "client auth" ] } } } } EOF配置证书请求
生成 CA 证书
由于这里是 CA 证书,是签发其它证书的根证书,这个证书密钥不会分发出去作为 client 证书,所有组件使用的 client 证书都是由 CA 证书签发而来,所以 CA 证书的 CN 和 O 的名称并不重要,后续其它签发出来的证书的 CN 和 O 的名称才是有用的。
生成服务端证书
配置证书请求
创建服务器端证书和私钥
1[root@etcd01 etcd]# cfssl gencert -ca=ca.pem -ca-key=ca-key.pem -config=ca-config.json -profile=server server-csr.json | cfssljson -bare server生成如下文件
生成客户端证书
配置证书请求
创建客户端证书和私钥
1[root@etcd01 etcd]# cfssl gencert -ca=ca.pem -ca-key=ca-key.pem -config=ca-config.json -profile=client client-csr.json | cfssljson -bare client生成如下文件
生成对等证书
配置证书请求
创建对等证书和私钥
1[root@etcd01 etcd]# cfssl gencert -ca=ca.pem -ca-key=ca-key.pem -config=ca-config.json -profile=peer peer-csr.json | cfssljson -bare peer生成如下文件
拷贝密钥到所有节点
| |
更新系统证书库(三个节点都要操作)
修改 ETCD 配置文件(三个节点都要操作)
主要是将原来的 http 链接全部改为 https,并指定证书密钥地址
ETCD01 节点的配置
vim /etc/etcd/etcd.conf1 2 3 4 5 6 7 8 9 10 11 12 13 14 15 16 17 18 19 20 21 22 23 24 25 26 27 28 29 30 31 32 33 34# 节点名称 name: "etcd01" # 数据存储目录 data-dir: "/data/etcd" # 对外公告的该节点客户端监听地址,这个值会告诉集群中其他节点 advertise-client-urls: "https://172.20.10.129:2379" # 监听客户端请求的地址列表 listen-client-urls: "https://172.20.10.129:2379,https://127.0.0.1:2379" # 监听URL,用于节点之间通信监听地址 listen-peer-urls: "https://172.20.10.129:2380" # 服务端之间通讯使用的地址列表,该节点同伴监听地址,这个值会告诉集群中其他节点 initial-advertise-peer-urls: "https://172.20.10.129:2380" # etcd启动时,etcd集群的节点地址列表 initial-cluster: "etcd1=https://172.20.10.129:2380,etcd2=https://172.20.10.132:2380,etcd3=https://172.20.10.134:2380" # etcd集群的初始集群令牌 initial-cluster-token: 'etcd-cluster' # etcd集群初始化的状态,new代表新建集群,existing表示加入现有集群 initial-cluster-state: 'new' # 日志配置 logger: zap # 客户端加密 client-transport-security: cert-file: "/etc/etcd/pki/server.pem" key-file: "/etc/etcd/pki/server-key.pem" client-cert-auth: True trusted-ca-file: "/etc/etcd/pki/ca.pem" # 节点加密 peer-transport-security: cert-file: "/etc/etcd/pki/peer.pem" key-file: "/etc/etcd/pki/peer-key.pem" client-cert-auth: True trusted-ca-file: "/etc/etcd/pki/ca.pem"ETCD02 节点的配置
vim /etc/etcd/etcd.conf1 2 3 4 5 6 7 8 9 10 11 12 13 14 15 16 17 18 19 20 21 22 23 24 25 26 27 28 29 30 31 32 33 34# 节点名称 name: "etcd02" # 数据存储目录 data-dir: "/data/etcd" # 对外公告的该节点客户端监听地址,这个值会告诉集群中其他节点 advertise-client-urls: "https://172.20.10.132:2379" # 监听客户端请求的地址列表 listen-client-urls: "https://172.20.10.132:2379,https://127.0.0.1:2379" # 监听URL,用于节点之间通信监听地址 listen-peer-urls: "https://172.20.10.132:2380" # 服务端之间通讯使用的地址列表,该节点同伴监听地址,这个值会告诉集群中其他节点 initial-advertise-peer-urls: "https://172.20.10.132:2380" # etcd启动时,etcd集群的节点地址列表 initial-cluster: "etcd1=https://172.20.10.129:2380,etcd2=https://172.20.10.132:2380,etcd3=https://172.20.10.134:2380" # etcd集群的初始集群令牌 initial-cluster-token: 'etcd-cluster' # etcd集群初始化的状态,new代表新建集群,existing表示加入现有集群 initial-cluster-state: 'new' # 日志配置 logger: zap # 客户端加密 client-transport-security: cert-file: "/etc/etcd/pki/server.pem" key-file: "/etc/etcd/pki/server-key.pem" client-cert-auth: True trusted-ca-file: "/etc/etcd/pki/ca.pem" # 节点加密 peer-transport-security: cert-file: "/etc/etcd/pki/peer.pem" key-file: "/etc/etcd/pki/peer-key.pem" client-cert-auth: True trusted-ca-file: "/etc/etcd/pki/ca.pem"ETCD03 节点的配置
vim /etc/etcd/etcd.conf1 2 3 4 5 6 7 8 9 10 11 12 13 14 15 16 17 18 19 20 21 22 23 24 25 26 27 28 29 30 31 32 33 34# 节点名称 name: "etcd03" # 数据存储目录 data-dir: "/data/etcd" # 对外公告的该节点客户端监听地址,这个值会告诉集群中其他节点 advertise-client-urls: "https://172.20.10.134:2379" # 监听客户端请求的地址列表 listen-client-urls: "https://172.20.10.134:2379,https://127.0.0.1:2379" # 监听URL,用于节点之间通信监听地址 listen-peer-urls: "https://172.20.10.134:2380" # 服务端之间通讯使用的地址列表,该节点同伴监听地址,这个值会告诉集群中其他节点 initial-advertise-peer-urls: "https://172.20.10.134:2380" # etcd启动时,etcd集群的节点地址列表 initial-cluster: "etcd1=https://172.20.10.129:2380,etcd2=https://172.20.10.132:2380,etcd3=https://172.20.10.134:2380" # etcd集群的初始集群令牌 initial-cluster-token: 'etcd-cluster' # etcd集群初始化的状态,new代表新建集群,existing表示加入现有集群 initial-cluster-state: 'new' # 日志配置 logger: zap # 客户端加密 client-transport-security: cert-file: "/etc/etcd/pki/server.pem" key-file: "/etc/etcd/pki/server-key.pem" client-cert-auth: True trusted-ca-file: "/etc/etcd/pki/ca.pem" # 节点加密 peer-transport-security: cert-file: "/etc/etcd/pki/peer.pem" key-file: "/etc/etcd/pki/peer-key.pem" client-cert-auth: True trusted-ca-file: "/etc/etcd/pki/ca.pem"
重启服务(三个节点都要操作)
| |
验证
| |
